


DIY Fairy Tale Bird Feeder
- Autumn Rozario Hall
- Jan 3, 2018
- 6 min read

The idea for this simple DIY bird feeder came to me when I was browsing Michael’s art supply store. I was looking supplies to make Christmas ornaments when I found this large plastic globe with a pre-cut hole in the side. Plans for different projects using the globe flooded my thoughts. I could make a terrarium, or a fairy garden ornament. Then I had the perfect idea. Wouldn’t it be great to have a bird feeder where you could see the birds from all angles? I had already been planning on sharing DIY bird feeder, but the clear globe made this one extra special. I’ve decorated it to look like something out of a fairy tale. It’s wonderful to watch them happily hopping around outside. I can see them from the living room window or from my studio as I paint.
Important Note: The globe ornaments I used are on clearance at Michael's Craft Stores. They are from their Christmas supplies. If you can’t find one with the pre-cut hole try Oriental Trading Co, or see my notes at the end of the post
Step 1. Gather your supplies.
You will need:
1 large plastic globe ornament with a hole in the side*
3-4 Large or medium pinecones
Strong burlap string
Laminated paper or bendable plastic to make a cone
Hot Glue gun and glue
Scissors
Exacto knife or hole punch.
Base:
Popsicle stick or natural stick
Plastic lid- at least 4” round
Clear plastic thread or craft wire
Gesso and craft paint
Decorative embellishments such as craft moss, mini mushrooms, snail shells, rocks, crystals etc.
Step 2. Pine Cone Shingles
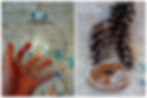
Start by making the roof of the bird feeder. It is made of layered pinecones to look like shingles. I selected large pinecones so I wouldn’t need as many shingles. I ended up using three pinecones that were each five inches long. If your pinecones have a bunch of sap on their edges, its best to pop them in the oven for 30 minutes at 200 degrees. This will melt off the sap, and kill any critters that may be hiding in them. Remember to use parchment paper so the sap doesn’t get on your pan.

Start by removing the shingles from the pinecone as pictured in Fig. 2. Begin cutting in the middle of the pinecone. This will make it easier to reach the rest of the shingles with your scissors. Cut them off close to the center of the pinecone to give you longer shingles which are easier to work with. Once you have a bowl full of pine shingles you are ready to start the roof.
Step 3. Gluing on the Roof
First, heat up your glue gun. I’m using extra-strong bond, non-toxic glue. Make sure its non-toxic for the birds. I also lightly sanded the upper half of the globe to help the glue adhere better.
Next, get out the clear globe ornament. I’m using the ones with a large hole in the side from Michael’s Craft Store. If you can’t find this, see my note at the end of the article.*
Begin by placing your first shingles above the opening of the globe. The first row is the easiest. Draw a line half way around the feeder with the glue gun. Then, attach the shingles like in fig. 3. Make sure they are good and attached. Continue until you have a row of shingles all the way around the globe.

Then, start the next row by staggering the pine shingles so they overlap. Complete the second row.
Step 4. Making the Pointed Roof.

Next, take your laminated paper and make a small wide cone for the point of the roof. You may use a bendable plastic or other material here, as long as it is waterproof for when the bird feeder is outside. Make sure the cone has a small hole at its tip for the burlap string. Glue the paper so it keeps its cone shape. Trim the bottom of the paper until it is flat. I made my cone wide, not narrow, so it would blend in well with the round shape of the globe. See Fig. 4
Next, take your burlap twine and tie it around the hook at the top of the globe. Make a loop large enough to go through the cone. This is where you will hang the feeder from. Pull the loop through the cone and then attach the cone to the bird feeder with hot glue. See Fig. 5.

Continue building the roof with the pine shingles. Makes sure to place the glue so the shingles are glued to the cone, and some of the shingles below them. Wrap the shingles around the cone until they reach the top. Now the roof is complete.
Step 5. The Base
Now that the roof is finished, let’s move onto the base. I’ve included instructions for two ways to do it:
Method 1
The first one is more basic. Simply cut a slit in the plastic of the globe just above the flat bottom. Then insert your popsicle stick. Leave a good amount of the stick facing out so the birds can perch upon it when feeding. You may also want to squeeze a little glue below the stick to better secure it to the base of the feeder.
Method 2
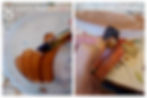
The second method uses a repurposed plastic lid. You’ll want one that’s about 4” around. I used one from a pint-sized ice cream, but any plastic lid will do. First, paint the top with gesso. This will make the craft paint stick better. Then, paint the top with your choice of acrylic craft paint.Fig. 8
Next, glue a row of pinecone shingles around the base. To finish, glue a strip of your burlap string above the pinecone shingles to make it look neat and hide uneven edges. When this is done, you are ready to attach the base to the globe.

Locate the flat bottom base of the globe. This is a thicker plastic so we want to poke our holes just above this. Use an awl or a large needle. You will make two holes on one side and two holes across the base on the other side. See Fig. 7. Cut two pieces of craft wire. Poke your craft wire through the holes on the left so it makes a loop through the inside of the globe. Do the same with the other side.
Position the globe on the base where you want it to sit. Mark where the holes are on the globe. Punch matching holes through the base. Put the craft wire through the holes on the base and secure the globe to the base by twisting the wires below the base. See Fig. 6
Now, you are ready to attach your perch for the birds. You can use a popsicle stick, a dowel rod or a natural stick. I chose a natural stick to go with my woodland theme. First, I broke the stick to the length I wanted it. I decided to add two sticks so the birds would have two perches. Now, hot glue the sticks to the base in front of the opening of the globe.
Step 6. Decorating

You’re almost finished! All that’s left is to decorate the base and roof. I used some more craft moss, mini mushrooms, and left over floral buds from earlier projects. I’ve placed them in places where extra glue was showing or where tiny gaps in the pinecone shingles didn’t look as good as I wanted. You can decorate this however you want, just remember to use water proof items that will weather well. See Fig. 7
Your fairy tale bird feeder is now complete! Fill the feeder with seed and hang from the loop. You can also attach a longer string or chain to the loop if you wish to make it longer.
I hope enjoy your fairy tale bird feeder as much as I am enjoying mine. I’d love to see pictures of what you come up with. Please leave a comment or message me with your creations.

Tips- Refill the bird feeder regularly to encourage birds to visit more frequently and so they know they can rely on your feeder as a food source.
Only place about a day’s worth of seed in the feeder. Because this feeder had a plastic bottom, dew or rain could collect there, causing excess seed to mold.
*Note on Clear Ornament Globe. If you can’t find one with a hole in the side, you can use a large one without a hole. Just trace a circle where you want the opening to be. Carefully cut it out with an exacto knife, and then lightly sand the edges so they are not sharp for your hands or the birds. Look for plastic Ornaments at Michael’s and Hobby Lobby, or online at Oriental Trading Co.